In an increasingly connected world, enhancing home security and convenience starts right at your doorstep. Video doorbells have revolutionized how we interact with visitors and monitor our homes, and Ring has emerged as a leader in this smart home revolution. Installing a Ring Video Doorbell might seem like a daunting task, but with the right guidance, it’s a straightforward process that empowers you with peace of mind. This comprehensive guide will walk you through every step, from initial setup to troubleshooting, ensuring your Ring device is perfectly integrated into your home security ecosystem.
Understanding Your Ring Video Doorbell: Why It Matters
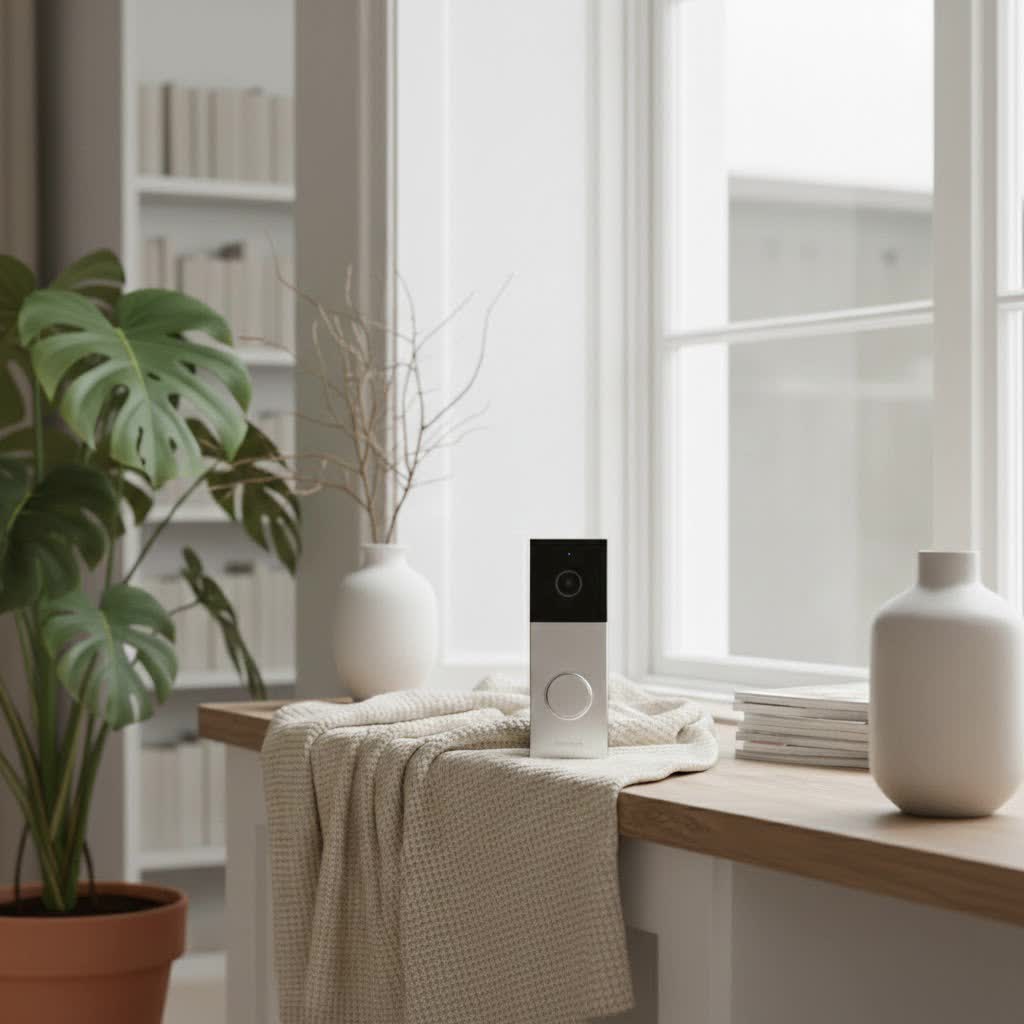
A Video Doorbell is more than just a button that rings inside your home; it’s a smart security device equipped with a camera, microphone, and speaker, allowing you to see, hear, and speak to anyone at your door from anywhere using your smartphone, tablet, or PC. This innovative technology provides invaluable benefits, including enhanced security through real-time monitoring and motion detection, unparalleled convenience by answering your door remotely, and greater control over who accesses your property. Ring’s suite of video doorbells offers a robust solution for protecting your home, enabling you to keep an eye on packages, deter potential intruders, and never miss a visitor again.
Wired vs. Battery-Powered Ring Doorbells: Choosing Your Installation Path
Before diving into the installation process, understanding the fundamental differences between wired and battery-powered Ring Video Doorbells is crucial. Your choice will largely dictate the installation steps and considerations.
Battery-Powered Ring Doorbells: Flexibility and Simplicity
Battery-powered Ring Video Doorbells offer the utmost flexibility and ease of installation, making them ideal for homes without existing doorbell wiring or for those who prefer a less invasive setup.
- Advantages: Installation is generally quicker and simpler, requiring no electrical work. These models are highly portable, allowing you to place them in various locations around your home.
- Disadvantages: The primary drawback is the need for periodic battery recharging. Depending on usage and environmental factors, this could range from every few weeks to several months. A depleted battery means a temporary lapse in monitoring.
|
Our Picks for the Best Video Doorbell in 2026
As an Amazon Associate I earn from qualifying purchases.
|
||
| Num | Product | Action |
|---|---|---|
| 1 | Noorio Wireless Doorbell Camera with Rechargeable Battery, 2K+ Resolution, 2-Way Audio, Color Night Vision, AI Motion Detection, Smart Video Doorbell Works with Alexa, D110 |

|
| 2 | Blink Outdoor 4 – Wireless smart security camera, two-year battery life, 1080p HD day and infrared night live view, two-way talk. Sync Module Core included – 2 camera system |
|
| 3 | Ring Indoor Cam, Home or business security in 1080p HD video, White |
|
| 4 | Ring Battery Doorbell (newest model), Home or business security with Head-to-Toe video, Live View with Two-Way Talk, and Motion Detection & Alerts, Venetian Bronze |
|
| 5 | Tapo by TP-Link Smart Video Doorbell Camera Wireless with Chime, 2K with Full Color Night Vision & Spotlights, No Monthly Fee, Ring Call, 160° Ultra-Wide View, Free AI Detection, Local Storage,D210 |
|
| 6 | Blink Mini 2 — Home Security & Pet Camera with HD video, color night view, motion detection, two-way audio, and built-in spotlight — 1 camera (White) |
|
| 7 | Ring Battery Doorbell (newest model), Home or business security with Head-to-Toe video, Live View with Two-Way Talk, and Motion Detection & Alerts, Satin Nickel |
|
| 8 | Blink Video Doorbell (newest model) – Head-to-toe HD view, two-year battery life, and simple setup. Sync Module Core included – System (Black) |
|
| 9 | Blink Video Doorbell (newest model) – Head-to-toe HD view, two-year battery life, and simple setup. Required Sync Module not included – Add-On (White) |
|
| 10 | NariOrbi WiFi Video Doorbell Camera with Human Detection, Battery Powered, Night Vision, 2-Way Talk, 2.4G WiFi, Cloud Storage |
|
Wired Ring Doorbells: Continuous Power and Chime Integration
Wired Ring Video Doorbells connect to your home’s existing doorbell wiring, offering continuous power and the ability to integrate with your traditional indoor chime.
- Advantages: With constant power, you eliminate the need for battery recharging, ensuring uninterrupted surveillance. Many wired models also leverage your existing indoor chime, providing an audible alert within your home in addition to app notifications.
- Disadvantages: Installation requires working with your home’s electrical wiring, which may be intimidating for some. It’s essential to verify your existing doorbell transformer’s compatibility, typically requiring a voltage between 8VAC – 24VAC (or 10-24 VAC, 50/60 Hz, 10-40 VA for newer models) to adequately power the device.
Essential Tools and Preparations Before You Begin
A smooth installation begins with proper preparation. Gather these common tools and complete a few pre-installation steps.
Commonly Needed Tools:
- Ring Screwdriver: Often included in the box, featuring a unique star-shaped end for security screws.
- Drill: Essential for drilling pilot holes, especially on hard surfaces.
- Drill Bits: A 1/4″ masonry drill bit is typically required for brick, stucco, or concrete. Standard drill bits for wood or siding.
- Wall Anchors: Included for masonry surfaces to ensure a secure mount.
- Level: Sometimes included, or a standard level to ensure your doorbell is mounted straight.
- Wire Nuts and Wire Extenders: Often included with wired models, useful if your existing doorbell wires are short.
- Pencil: For marking drill hole locations.
- Voltage Detector (for wired installations): To confirm power is off.
- Small Flathead Screwdriver: May be needed for terminal screws on wired models.
- Special Orange Tool (for some battery models): Used to detach the doorbell from its mounting bracket for battery removal.
Pre-Installation Steps:
- Charge the Battery (Battery Models): If you have a battery-powered Ring Doorbell, fully charge its battery using the provided USB cable. The indicator light will signal when charging is complete.
- Download the Ring App: Install the Ring app from your device’s app store (iOS or Android). This app is your command center for setup, live view, and settings.
- Create a Ring Account: If you’re a new user, create an account within the app. Existing users can simply log in.
- Gather Wi-Fi Password: Have your home’s Wi-Fi network name (SSID) and password readily available. Your Ring device will need to connect to your 2.4 GHz Wi-Fi network for optimal performance.
- Test Existing Doorbell (Wired Models): If replacing an existing wired doorbell, test it to ensure it’s functioning before you begin. Note where your indoor chime is located.
Step-by-Step Installation Guide for Your Ring Video Doorbell
Whether you have a wired or battery-powered model, the installation process generally follows a sequence of app setup and physical mounting.
Initial App Setup: Getting Connected
The Ring app guides you through the digital setup, which is best done near your Wi-Fi router.
- Open the Ring App: Launch the app and select “Set Up a Device.”
- Scan QR Code: The app will prompt you to scan the QR code located on the back of your Ring Video Doorbell. This links your device to your account.
- Follow In-App Prompts: Name your doorbell, confirm your location, and then follow the instructions to connect your Ring device to your home’s Wi-Fi network. Ensure you connect to a 2.4 GHz network for the best range and stability.
- Enter Setup Mode: You’ll be instructed to press the setup button (often orange) on your doorbell to put it into setup mode, indicated by a spinning white light on the front.
Physical Installation: Mounting Your Doorbell
Once the app setup is complete, it’s time to physically mount your Ring Video Doorbell. The exact steps vary slightly depending on whether your model is wired or battery-powered. It’s generally recommended to mount the doorbell approximately four feet (1.20 meters) above the ground for optimal performance and motion detection.
For Wired Installations:
- Turn Off Power: This is a critical safety step. Go to your home’s circuit breaker box and turn off the power to your existing doorbell system. Use a voltage detector to confirm the power is off before proceeding.
- Remove Old Doorbell: Carefully unscrew and remove your existing doorbell button from the wall. Disconnect the two wires and ensure they don’t fall back into the wall.
- Install Chime Bypass (Jumper Cable): For most wired Ring doorbells, you’ll need to bypass your existing indoor chime. Locate your chime box (usually near the front door), remove its cover, and connect the included jumper cable to the “Front” and “Trans” terminals. This ensures consistent power to your Ring device without issues.
- Mark and Drill Holes: Hold the Ring mounting bracket against the wall at your desired height. Use a pencil to mark the screw hole locations.
- For Wood/Siding: Screw the bracket directly into the wall.
- For Masonry (Brick, Stucco, Concrete): Use a 1/4″ masonry drill bit to drill pilot holes at the marked locations. Insert the provided wall anchors into these holes.
- Connect Doorbell Wires: Loop one of your existing doorbell wires around each of the screw terminals on the back of your Ring Video Doorbell. It doesn’t matter which wire connects to which screw. Tighten the terminals to secure the wires. If the wires are too short, use the included wire extenders and wire nuts. Feed any excess wiring back into the wall.
- Mount the Ring Doorbell: Secure the Ring mounting bracket to the wall using the included screws. Then, align your Ring Video Doorbell with the bracket and firmly push it until it clicks securely into place.
- Restore Power: Return to your breaker box and turn the power back on. Your Ring Doorbell should power on and indicate it’s ready.
For Battery-Powered Installations:
- Mark and Drill Holes: Hold the mounting bracket against the wall at your desired height. Use a pencil to mark the screw hole locations.
- For Wood/Siding: Screw the bracket directly into the wall.
- For Masonry (Brick, Stucco, Concrete): Use a 1/4″ masonry drill bit to drill pilot holes at the marked locations. Insert the provided wall anchors into these holes.
- Mount the Ring Doorbell: Secure the Ring mounting bracket to the wall using the included screws. Then, align your Ring Video Doorbell with the bracket and firmly push it until it clicks securely into place.
- Insert Battery (if removable): For models with removable batteries, ensure the fully charged battery is inserted into the bottom of the doorbell until it clicks into place.
Finalizing Setup and Testing
With your Ring Video Doorbell physically installed, a few final steps will ensure optimal functionality.
- Attach Faceplate and Security Screw: Place the decorative faceplate onto your doorbell (if applicable) and secure it with the small security screw located at the bottom using the star-shaped end of the provided screwdriver. This deters theft.
- Test Functionality: Press the doorbell button to verify it rings your phone and, for wired setups, your indoor chime. Use the Ring app to check the live view and two-way talk feature.
- Adjust Settings: Within the app, fine-tune motion detection zones, privacy zones, and notification preferences to suit your home’s specific needs.
Optimizing Your Ring Video Doorbell Experience
To get the most out of your Ring Video Doorbell, consider these optimization tips:
- Optimal Mounting Height: While the general recommendation is around 4 feet (1.20 meters) above the ground, this can be adjusted based on the specific Ring model and your home’s layout to capture the best field of view for visitors and packages.
- Using Wedge and Corner Mounts: If your doorbell is positioned in a corner or if existing wiring dictates a higher installation, Ring provides wedge and corner mounts. These accessories angle the camera by 15 degrees or more, helping to widen the field of view and capture more of your entryway. Install these mounts before attaching the main doorbell bracket.
- Enhancing Wi-Fi Signal: A strong and stable Wi-Fi connection is paramount for your Ring Doorbell’s performance. If your Wi-Fi signal is weak at the installation location, consider moving your router closer, or investing in a Wi-Fi extender like the Ring Chime Pro. This not only boosts the signal but also acts as an additional indoor chime.
Common Installation Challenges and Troubleshooting Tips
Even with careful planning, you might encounter minor hurdles. Here are common issues and how to resolve them:
- Wi-Fi Connectivity Issues:
- Weak Signal: If your doorbell struggles to connect or experiences frequent disconnections, it’s likely a weak Wi-Fi signal. Try moving your router closer, using a Wi-Fi extender (like the Ring Chime Pro), or ensuring you’re connected to a 2.4 GHz network, which generally offers better range.
- Incorrect Password/Network Name: Double-check your Wi-Fi password for typos. Avoid special characters (like !, @, #) in your Wi-Fi network name (SSID) as they can sometimes cause connection problems.
- Power Problems (Wired):
- Underpowered Transformer: If your wired Ring Doorbell isn’t powering on or your existing indoor chime isn’t ringing, an underpowered transformer is a common culprit. Ring doorbells typically require a transformer rated for at least 16V AC. You might need to consult a licensed electrician to upgrade your transformer.
- Chime Not Working (Wired):
- Chime Bypass: Ensure the chime bypass (jumper cable) is correctly installed in your indoor chime box, connecting the “Front” and “Trans” terminals.
- Digital Chimes and Diodes: If you have a digital chime (one that plays a melody), some older Ring models may require the included diode to be installed on the chime terminals. If your chime doesn’t ring, try reversing the diode’s direction. Do not use a diode for mechanical chimes.
- Physical Mounting Difficulties:
- Uneven Surfaces: If the mounting bracket isn’t sitting flat against the wall, it can prevent the doorbell from clicking into place. Avoid over-tightening screws on uneven surfaces to prevent bending the bracket.
- Short Wires: For wired installations, if existing wires are too short, use the included wire extenders and wire nuts to make the connections manageable.
- Screws Not Holding: Ensure you’re using the correct screws and wall anchors for your specific wall material (wood, brick, stucco, concrete).
- App Setup Glitches:
- Repeated Failures: If setup repeatedly fails, try performing a factory reset on your Ring device (usually by holding down the orange setup button for 15-20 seconds) and starting the app setup process again.
- Device Compatibility: In rare cases, try using a different mobile device for the initial app setup.
Conclusion
Installing a Ring Video Doorbell is an empowering step towards a smarter, more secure home. By understanding the differences between wired and battery models, gathering the right tools, and following a methodical approach, you can successfully set up your device and begin enjoying enhanced security and convenience. Remember to always prioritize safety, especially when dealing with electrical wiring, and don’t hesitate to consult a professional if you encounter challenges beyond your comfort level. With your Ring Video Doorbell properly installed, you’ll gain invaluable peace of mind, knowing you’re always connected to your front door. What will you discover at your doorstep next?
Frequently Asked Questions
How long does it typically take to install a Ring Video Doorbell?
Most Ring Video Doorbell installations, especially battery-powered models, can be completed within 15-30 minutes after initial app setup. Wired installations might take slightly longer, around 30-60 minutes, due to the additional steps involving existing wiring and the chime box.
Do I need a special drill for brick walls when installing my Ring Doorbell?
Yes, if you are mounting your Ring Doorbell on brick, concrete, or stucco, you will typically need a power drill equipped with a 1/4″ masonry drill bit. This ensures proper pilot holes for the included wall anchors, providing a secure and stable mount.
What if my Wi-Fi signal is weak at the installation location?
A weak Wi-Fi signal can lead to connectivity issues and poor performance. You can improve this by moving your Wi-Fi router closer to the doorbell, or by using a Wi-Fi extender like the Ring Chime Pro. The Chime Pro not only boosts your signal but also acts as an indoor chime.
Can I install a wired Ring Doorbell if I don’t have existing doorbell wiring?
Technically, no. Wired Ring Video Doorbells are designed to connect to existing low-voltage doorbell wiring. If you don’t have existing wiring, you would either need to have new wiring installed by an electrician or opt for a battery-powered Ring Video Doorbell model instead.
How often do I need to charge a battery Ring Doorbell?
The frequency of charging a battery-powered Ring Doorbell depends on several factors, including motion detection frequency, live view usage, and local weather conditions. On average, a Ring battery can last anywhere from a few weeks to several months between charges. The Ring app will notify you when the battery is running low.